Saturday, February 6, 2010

Brinley's Art and Kerri's Canvas

I just completed 2 canvases as gifts! The first was for my cousin Charla's sweet new baby girl, Brinley. Her bedding is gorgeous.....lovin' the black and white again. Here's a pic of the bumper, one side patterned and the other striped.


I wanted to add a little color, so the backrground was a very pale turquoisish gray, and the lettering is in red.


polka dots for the border!


a side view of the stripes

And onto the next one......this is a picture of my sister-in-laws bedding. It's adorable......from Anthropologie. She wanted a big canvas, 2ft by 4ft, to hang over the bed. She requested the big flower. So, here is what I came up with!

I like the simplicity of just the large flowers. I was going to add something else, but decided the canvas would look too crowded if I did. The background color is a shade of green.

Close up of the flowers....I haven't seen it hanging yet, but hope this is what she wanted!

Tuesday, December 15, 2009

Janda's Art

I just finished two paintings for my sweet friend, Janda. The first was for Adyson, her 3 year old, and the second one was for Aubyn, baby girl due any day!!

This is what Ady's bedding looks like. Actually, this is what it was like, but she had it cut up and re-sewn into big girl bedding. The pattern is called Scribbles.

Ady's painting

I took these pictures at night in my bedroom, and they didn't turn out well. With the flash they were too bright, and without they were too dark......So when Janda gets them up in the girls' rooms, maybe she can send me some better pictures and I can post them! I put 1 Samuel 1:27 on Ady's painting at Janda's request!

little flowers on the sides; you can see the dark brown scribbles in this picture

And here's Aubyn's bedding....isn't it to die for??!!?? It's Cocalo Harlow Couture bedding. I love the color combination. They painted an accent wall in her nursery of hot pink, which looks amazing with the green and black.

This one's a monster, ya'll. It was 4feet long by 2feet wide. I have to admit, it's my favorite one to date that I've painted. Lots of tedious drawing, but worth it!

Another shot of the full length

I wanted a pearl look around the border, so I used FABRIC PAINT! I didn't know if it would work, but it did! Love how that part turned out.

The edges are striped, like on the crib bumper

Don't you love her name??

Can't wait for your arrival, Aubyn Elizabeth!

Saturday, December 5, 2009

The Perfect Stockings

If you get Ballard Designs catalog, then you've seen these adorable stockings for sale for $35 a piece!!! Now I don't know about you, but I would never pay that for a stocking. That would be almost $150 for a family of four, just for stockings! But, when I saw them, I wanted them so bad. Enter my ever so talented mom! I bought some fabric, showed her the catalog, and within 2 weeks I had my very own adorable stockings. Check 'em out!

picture from Ballard Designs

And my beauties! I had the monogramming done here at a local place. It was $25 for all four monograms, $8 on upholstery fabric from Hobby Lobby, and $6 on leopard fabric and pompoms from Wal-Mart. Total cost of all 4 stockings = about $40 (mucho better than $150!)

so pretty

my mantel, complete now with our personalized stockings!

and here's gigantor tree.....this thing is tall and huge in diameter at the bottom, but we love her

Monday, November 30, 2009

Painted Ornaments

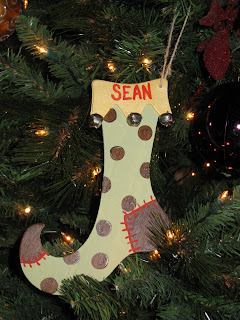
As soon as Thanksgiving is done, the Christmas decorations go up! This year I've had fun painting some personalized ornaments for our big tree in the living room. I just bought some unfinished ornaments from Hobby Lobby and painted them however I wanted! Here are the 4 stockings that I just finished. I picked these because they are actually pretty big, and we have a humooooongous tree. So, here they are...


Here are a few pics of my dining room. I just love the christmas tree in there. It's slender and rustic looking, with pine cones and sparse branches. In fact, it's the only tree we put up last year. This year, we did gigantor tree in the living room, and this one in the dining room. Sean says the feathers out the top are an ode to my maiden name....ha ha - Peacock!

Nativity scenes are one of my favorite things about this season. I love my wooden one. To add some fun on the sides, I filled apothecary jars with beads, wooden balls, and shiny ornaments.

This is what I came up with for a centerpiece. I like using a tray to hold all of my goodies, and this vase seems to be just right from one season to the next, so I've just been switching out the filler. I found fun beads and feathers at Hobby Lobby. I had the two topiaries from clearance after Christmas a few years ago, and threw in some natural looking ornaments on the tray. All I have to say is it's a good thing we don't live in the same town as a Hobby Lobby. I can do some serious damage in that store!

Tuesday, November 3, 2009

Sweet Dreams

I just finished my first canvas for someone who I really don't know. I was hired out.....I guess you could say! Anyways, it was a lot of fun and I hope to do more for people in the future. A little extra income is always good, and especially when it comes from something that you love to do! Here is the sweet fabric that I went off of............

And here's the painting.....this thing was big, ya'll. It was 2ft by 4ft, even though it doesn't look all that big in the picture. The wording is hard to see, but says "Sweet Dreams little man"

Stripes on the sides, with every other one having turquoise dots along the edges


I hope it goes well in the room!

Wednesday, October 21, 2009

Thanksgiving Plaque for 50cents

I picked up 4 of these golden beauties at a garage sale awhile back for $2. They're kind of flimsy foil, but I bought them with an idea to make Holiday plaques out of them. I decided to make one for Thankgiving to go above my cabinets. This is what it looked like before......


I painted it cream color and then roughed it up a little with sand paper, wrote a fun little phrase on it, and voila'!

a SUPER cheap tray to decorate for the fall

Monday, October 5, 2009

Family Rules

One of the blogs that I like to follow, The Pleated Poppy, posted a few weeks ago on how to do this adorable family rules board. She did hers on canvas, but I put mine on a big square piece of MDF. I made it for my dear friend, Janda, to hang in her daughter's (soon to be daughters') bathroom! I just love how it turned out. I had fun making up the rules, and borrowed or rearranged a few of the ones she had posted on her blog entry. It was pretty easy to do....just need fun scrapbook paper, paint markers, something to put it all on, and some mod podge.
the finished product!
I hand wrote the rules, but you could print them out if you are printer savvy - which I am not! Especially since my printer has issues with thick paper. I used fun scissors or tore the edges so each piece would be unique.

A different view